Not so long ago I avoided using speed lights. My excuse was "I prefer to shoot in natural light." The truth was, I was afraid of using them because I didn't understand how they worked. My understanding of using 'A Flash' had roots going back to the old flash cube days where those little portable pocket cameras used one of those cubes to flood the area with light. Their range was limited to about 8 or 10 feet, and their light was harsh and direct often creating not only washed out features and strong shadows, but unwanted red eyes. Unfortunately, most peoples indoctrination into using 'flash' was similar to mine and as a result we developed incorrect mindsets of how flash photography was suppose to work.
In more recent years I found myself becoming more intrigued by their use because through the magic of the internet the real professionals, who know how to use artificial light, share their knowledge. The more I watched them work, the more I realized just how wrong I had been about speed lights. Used properly they can open up a whole new realm of photographic opportunity. Even so, I still struggled to understand the basic principles of their use. I was stuck, again, with a mindset developed through years of using the exposure triangle: f/stop, shutter speed, ISO believing that all exposures were strictly influenced by these axioms no matter who, what, or where you were shooting. Being trapped inside this exposure bubble mindset stymied my progress to understanding how to use speed lights. Then one day, after watching a Joe Brady video on the basics of using off camera flash, that bubble exploded and it all, for the first time, made sense. Even so, putting this understanding into practice took time along with trial and error, lot's of error. The journey has been extraordinary and I'd like to hopefully burst the exposure bubbles of those who also find themselves trapped inside. Let's take a closer look at the basics of this fascinating form of photography.
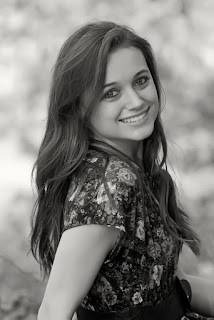 |
| A single OCF |
You can set your shutter speed just about anywhere up to the maximum flash sync speed and the flash will fire properly. But, that brings up the question of exposure. Now most name brand camera's and flash units will fire in what is known as TTL mode, or Thru The Lens exposure. This varies a great deal depending on the camera and the flash unit being used, but fundamentally this means the camera and the flash talk to each other to the point the flash knows how much light to output to create a correct exposure based on the camera settings and ambient light. We won't go into how they do that, just remember TTL is a flash exposure method that talks to the camera usually by using the popup flash on the camera as the trigger.
Let's talk briefly about the flash power settings. Depending on the unit, the output from the flash can be controlled to allow for full power settings with increments down by factors of two...like 1/2, 1/4, 1/8, 1/16....1/128, you get the idea. What this really means is this. The brightness of the light coming off the flash is exactly the same for all power settings, the difference is the length of time the light is allowed to fire. A setting of 1/4 will have a light pulse 4 times faster than a full power setting.
We briefly discussed TTL, so now we will look at shooting the flash in a manual mode. Shooting manually is actually my preferred method of using off camera flash. This gives me full control of the light and exposure. This is where you need to adjust your understanding of the exposure triangle.
When shooting a typical landscape you are setting an exposure based on a single zone of light. The light on the landscape comes from one source, the sun either directly or filtered through clouds or something like that. You use the exposure triangle to achieve the desired exposure, shutter speed, aperture, ISO. Shooting with an Off Camera Flash (OCF) is different and this is an important difference to understand. When using an OCF you are controlling two zones of light at the same time. What this means is your overall exposure is based on the background light or ambient light and the exposure on your main subject is based on the light coming off the flash unit. So...in essence you are setting your exposure to capture different sources of light at the same time.
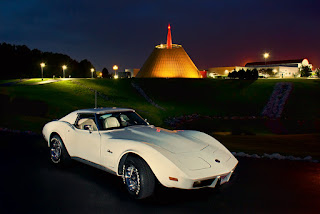 |
| Controlling two zones of light |
Now, this is important to understand and is the crux of most of the confusion of how to shoot with OCF. When shooting with an OCF you control the background ambient light exposure using the Shutter speed. You control the light off the flash using the Aperture. To simplify the concept just think of the OCF light as fill light used to illuminate your main subject and the ambient light is what illuminates the area around and/or behind your subject. To control both the easiest way is to set your background exposure based on the ambient light, then adjust your OCF power settings to provide the proper amount of fill light. By doing this, you are then controlling both zones of light at the same time. Let's say your background exposure is 1/125th at f/8.0 and ISO 200. In order to use an OCF to illuminate you main subject, it needs to be set to provide a light pulse that is equivalent to f/8.0. This may require some guess work, or you can use a light meter to see exactly how much light is coming off the flash.
If you change your shutter speed, lets say to 1/200th after making your OCF lighting adjustments, it will not affect the light and exposure coming off the flash. The background ambient light will be darker, but your subject will still receive the same amount of light off the flash. Think about that for a moment. Why is that? Well, the reason is this. When the flash fires, it generates a given amount of light for a specified amount of time based on the power setting. Generally speaking, the duration of the flash is usually very short, something like 1/2000th of a second or faster depending on the power setting. If you change the shutter speed say from 1/125th to 1/200th and retain the same aperture setting, the flash duration is still considerably faster than either of the shutter speeds and the same amount of light will be captured from the flash unit regardless of which shutter setting you select. The faster shutter speed will affect the ambient light making it appear to be darker or more underexposed, but does not affect the OCF light, so your subject will still remain properly lit. In fact, you could in theory eliminate all of the ambient light to create a total black background with the proper settings. However, should you adjust the aperture say from f/8.0 to f/11, then you will affect the OCF light exposure because now your flash is still outputting light at f/8.0, but your aperture is set to allow a full stop less light into the camera. To keep the same OCF exposure, you would need to increase the power output from the flash unit to equal the f/11 setting.
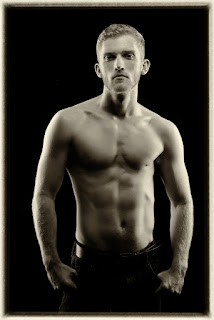 |
| Picture taken outdoors before dusk All Ambient Light removed by exposure settings so background is black. Used two OCF Strip Lights and one Octobox light overhead |
So, the next question is, how do you trigger a OCF? Well, there are multiple ways to do so. Actually, your flash unit will most likely have three basic settings; Wireless TTL, Manual, and Slave. Some flash units can have variations on these settings, but those are the fundamental three. Wireless TTL is most easily triggered by the popup flash on your camera. Once the camera and flash unit are set in wireless mode, the camera and flash talk to each other through a series of light pulses just before the main exposure flash fires. It all looks like a single pulse to the unaided eye, but in reality several short bursts of light fire off before the final exposure is made. A separate Commander flash unit sitting on top of your camera will accomplish the same thing. Another way to trigger your OCF is to use an electronic transmitter/receiver setup. The transmitter sits on top of your camera on the flash boot. The OCF flash is connected to a receiver unit that receives the signal from the transmitter. When the shutter release is fired, the transmitter fires sending a signal to the receiver to fire the flash. Depending on the kind of transmitter/receiver unit used, you can also make adjustments to the flash from the transmitter, things like changing the power settings. Some simply act as a trigger. The Slave mode is a flash setting that allows the flash unit to be triggered by any other flash. When any flash fires, the sensor in the Slave units detect the change in light and causes it to fire at the same time. This can be useful when combining different brand name flash units, or when only one transmitter/receiver is available. The Slave mode will ensure all flash units work together.
 |
| Using Multiple flash units |
p.s.
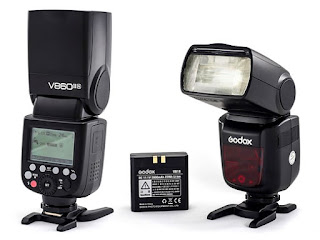
There are numerous third party speed lights (flash units) available at very reasonable prices that work very well. With a little shopping around, you can get started for well under $200.

