ESTABLISHED 2010 - Beyond The Campfire was created to encourage readers to explore the great outdoors and to observe it close up. Get out and take a hike, go fishing or canoeing, or simply stretch out on a blanket under a summer sky...and take your camera along. We'll talk about combining outdoor activities with photography. We'll look at everything from improving your understanding of the basics of photography to more advanced techniques including things likehow to see photographically and capturing the light. We'll explore the night sky, location shoots, using off camera speedlights along with nature and landscape. Grab your camera...strap on your hiking boots...and join me. I think you will enjoy the adventure.
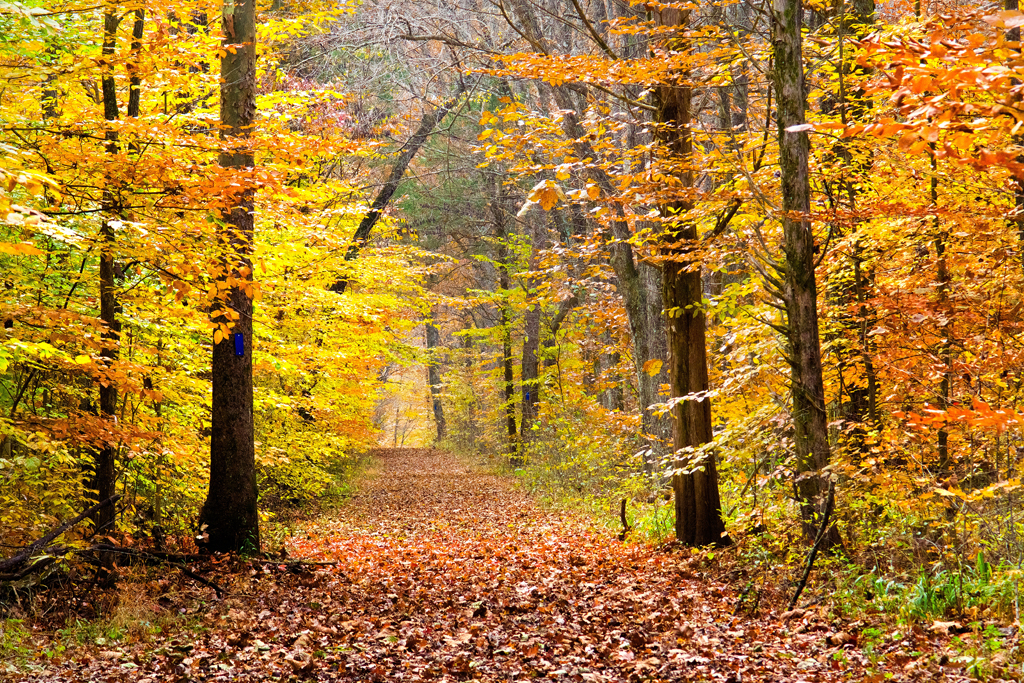
The beauty of the fall season in Kentucky is breathtaking
and hiking into the backcountry of Mammoth Cave National Park during this time
of year can transport one into a visual canopy of color.
Capturing the feeling of this world requires more than
simply physically walking down a trail with your camera in hand. It requires you
to fully immerse yourself into and becoming a part of the surroundings.There is a kind of bonding one develops with nature when you
allow yourself to let go of the everyday stresses of life and then receive the
soothing comfort discovered here. It helps you to step outside the distractions
of life, to be elevated above all the things that weigh us down emotionally, so
you begin to see the hidden compositions drifting across the landscape.
I wish I could get that feeling every time I go out, but it
is almost impossible to do so. There is an Art to it, the kind of art that is
difficult to define. It is the Art of Being There where you allow yourself to
become a part of the surroundings, where you feel the subtle sounds of the
woodlands,
hear the splash of light filtering through the trees, see the wind brush
across your face, then inhale the aroma of the flotsam of the forest floor.
When that happens, your camera becomes more than a tool…it
becomes an extension of your emotions. The art of being there is what this
Adventure Photography series is all about.
Yet it is more, for there will never be enough words to fully describe how it works because it is different for everyone. It's a feeling really, the kind that radiates deep from within yourself. It's more than simply recognizing that it can happen, it's experiencing it and living it all at once.
The Art of Being There as a photographer elevates those moments to a level well above what is ordinary...you are uplifted emotionally and everything becomes synchronized so much so, it all simply falls into place.
Over the years I've done a favorable amount of backpacking, enough anyway to feel accomplished at the endeavor. I've done far more canoe camping but both are excellent outdoor activities and they share some common elements that tend to blend their requirements into similar techniques. I recently made a return visit to spend time backpacking into the backcountry of Mammoth Cave National Park. While it is but a few miles up the road from where I live, the location has remained a somewhat neglected outdoor resource for me. Even so, there is an abundance of above ground outdoor opportunity awaiting anyone desiring a near wilderness adventure.
This year I jumpstarted my Beyond the Campfire Adventure Photography video series with the intent to motivate myself into getting out to photograph and explore the great outdoors more while I still have the ability to do so. As I climb toward the big 70 in age, my physical ability to purposely stress myself beyond what is ordinary has started to diminish to some degree.
Although I've stayed in pretty good shape for someone my age (lost 35 lbs, strength training at the gym, jumping rope, punching a heavy bag...and so on), my old body sometimes pushes back reminding me to slow down and take it easy for a little while. I've learned to listen to it in spite of the fact that my hearts desire tells me I'm still 25 years old.
My backpacking gear consists of mostly 25 years and older equipment...all venerable and functional...but, a bit on the heavy side. Today's modern, lightweight equipment was just a pipe dream back when I first started backpacking. Back then my budget allowed for only rudimentary and often heavy gear collected from the likes of the local Army Surplus Store, garage sales, and the local discount sporting goods store...a good portion of it was homemade make-do gear.
Similar to Mine
I use a 40-plus year old Coleman Peak One packer stove...probably one of the most dependable and useful pieces of gear I have. In all those years, it has never failed once. By today's standards, it is quite heavy, but it also includes the ability to fine tune the blue flame from a simmer to a fly me to the moon flaming torch. It will boil a pot of water in nothing flat, and a single tank of fuel will last for several days.
My old sleeping bag, also a Coleman Peak One, is also about 25 years old. It is filled with somewhere around 4 lbs of Quallofil fiber...where each strand when viewed thru a microscope contain 4 separate chambers...which gives it a temperature rating down to Zero degrees Fahrenheit. It's a bit bulky but has kept me warm on some very cold nights out in the boonies. A homemade flannel liner adds about 10 degrees to the temperature rating.
The newest piece of equipment I have is my self-inflating sleeping pad I purchased on a clearance sale about 15 years ago. One of the best investments I ever made.
I use 2 packer tents. One is somewhat larger and heavier than the other. On this trip I chose to use the bigger one because I wanted a little more elbow room for my camera gear. Made by Camp Trails it is a two man tent that actually fits one person and comes with a nice full cover rainfly which came in handy that night as a gentle rain fell pretty much all night.
The backpack I haul all of this gear around in is, again, about 25 years old. It is a JanSport Internal Frame large capacity pack. It has several outside pockets and various other straps and rings and things to attach whatever suits your style. It has been quite durable in spite of some abuse over the years.
Those are my main pieces of equipment along which I include various other assorted odds and ends to make up the 10 Essentials of Backpacking.
On this particular trip I included 2 cameras, 2 tripods, extra batteries, 2 extra lenses, and a fanny pack just for the camera stuff, because I wanted to shoot a lot of B-roll video footage and have enough flexibility to photograph the scenery as I saw fit. I normally would not have carried all of that extra weight, but in the long run I used all of it and the results were pretty good even if I say so myself.
The hike into the Bluffs area is pretty flat with some up and down dips and climbs until the last side trail that leads you to The Bluffs campground. There is about a 1/4 mile very steep drop down to the campsite and, consequently a 1/4 mile long very steep climb out. The climb out is much more difficult than the drop down especially when carrying a full pack.
Along the trail I encountered several muddy places but was easily able to skirt around them. You are pretty much walking through a cathedral canopy of trees, and during the fall, the colors are amazing. I made this trek the first couple days of November and although there were good splashes of color, the peak of the fall season had not arrived...(a week later it was in full swing).
A newer version
There is a source of water near the campsite. A spring flows over the edge of the first bluff you encounter with enough flow to create a small pool of water at its base. It good clean water and it's enough to easily fill several water bottles but the water must be treated before drinking. T o do so, I use a pumper style PUR Hiker water purification system (now called Katadyn) that will filter out pretty much everything that could make you sick. I've never gotten even the slightest grumbling in the tummy after drinking the filtered water...and the taste is fresh and clean.
It was another one of those really good additions to my gear collection.
Photographing the trip involved a series of B-roll video clips where I set up a camera on a tripod then film myself walking a little ways down range...walking back to retrieve the camera...then continue on. I wanted to video sections that provided not only scenic value, but also captured a representation of what the trail was like. Doing this obviously took more time, but it was well worth the extra effort.
Photographing the area was at times a challenge because it was difficult to see through all the clutter and focus in on a good subject. Even so, there were numerous photo ops available with the bluffs and within the surrounding canopy of the woodlands. The lighting was tough as most of the first day it was bright and sunny with a cobalt blue sky. Pretty to hike in and look at, but difficult to photograph because of the harsh contrasts such conditions produce. That became the real photo challenge...how to capture the scenic value without capturing the harsh contrasts?
I was able to build a fire and spent a while after sundown sitting around the warmth of its flames. It was the first time all day I felt like I could relax.
There is something magical about a campfire. I've built hundreds over the years and no two of them were the same, but each of them told a similar story. It's a story about why we need to sometimes put life on hold and travel into the wilderness to experience what it has to offer the soul. Sometimes Life gets in the way of Living.
A campfire helps us to step away from the stresses of life, to experience the calling that resides within our hearts. Backpacking, in spite of the physical demands, pushes the Mute button on Life, so we can begin living a little.
Sort of bringing the Blog back to life but with a newer approach. Will be posting a new video series over the next few months. Adventure Photography. This series will carry the theme "It's about the experience of being there". First on the menu includes the Introduction Video, followed by Parts 1 and 2 of the Shanty Hollow Series: Photographing Shanty Hollow Woodlands and "First Light" Canoeing and Photographing Shanty Hollow.
I would venture to guess that most photographers are most content when they are simply having fun with their camera. Maybe on vacation, or possibly just on a simple walkabout, capturing the world around us provides not only an easy creative outlet, but it also captures special moments within our lives. That is the way it should be, just have fun with it, then use the photographs to revisit those special life adventures.
Sometimes though as a photographer, I need to find a more meaningful outlet, to allow creative instincts an opportunity to explore more thoroughly the photographic possibilities waiting for discovery. That is when I begin to look more closely at how I can best use this tool called a camera to capture the world around me in ways that is less an exact reproduction of what I see, and more of a creation of what I feel. Doing so helps to generate a greater creative depth to the images I want to capture.
How to do this is open to interpretation because everyone contributes their personal insights into what they want to accomplish. Even so there are some common ways to apply creative depth to your photography.
One of the best ways is to learn how to use off camera flash. There are literally hundreds of videos and articles out there explaining the X's and O's of the technique, so I will not go into that discussion here. Instead let's explore some of the reasons why this type of photography can add creative depth to you photographs. First of all, any photographer worth his or her salt knows that light is the most important element in a photograph.
Quality light can turn an ordinary object or situation into a work of art. Natural light of course is the most commonly used, however when you begin to use off camera flash you start to explore the realm of controlling the light. With off camera flash you can control the intensity, the angle or direction, the color, and timing of the moment. You can throw in a little fill light, or contribute the maximum amount of light required for a shoot. It can be used with people, places, or objects, and it can be combined with the natural ambient light, it can even be made to look like natural light. In short, you become the master of the lighting moment. This allows you to visualize how you want the image to appear, the shadows, the reflections, the back light, the boldness or subtleness of the light becomes yours to control.
Another way to add creative depth is to take your camera off AUTO or Program Mode and learn how to manipulate exposure. Use the +/- exposure compensation tool on your camera to add or remove light from your composition. This allows you to darken or lighten natural light and to apply a specific tonality to a specific area of your composition. Contrary to popular belief, you do not have to capture the world exactly the way you see it. You have the ability to interject your desire onto your photograph.
A third way is to use post production software to enhance your photographs. This is not cheating, this is simply allowing you to project your vision into your photograph to create from what might be an ordinary image, an image with power and eye catching ability. Ansel Adams, probably the most famous American photographer of all time, applied this same concept to his photographs except he did not use a computer (they didn't exist then), he did it in the darkroom using various kinds of print papers and print exposure techniques. There are countless how to videos and articles available on Photoshop and Light Room, so there really is no excuse for not learning how to do this. Even very basic, routine applications can improve almost any photograph and allow you to create your vision.
Although I attempt to capture in camera the image I visualize as closely as I can, almost all of my images undergo some post processing adjustments, however small, however slight they may actually be. One thing I have also learned over the years is to not be afraid to break the rules. Breaking the photographic rules will sometimes lead to an amazing revelation about photography and the results can be spectacular.
Adding a measure of creative depth to your photographs is a personal adventure almost anyone can learn how to do. It is more a matter of desiring to discover the limits of your own creative instincts and have a willingness to try something new. Much of it comes from within and all you are doing is applying your inner visions to the tools you have available.
One of the most difficult kinds of photographs to capture is a photo taken within a deep woods, especially when the prevailing background color is green. In most cases you end up with an image with a harsh green tint cast across the entire frame. This is just the nature of light and requires a bit of creative white balance tweaking to prevent. Even so, a photo with that one prevailing color tint can in its own right become an interesting image. Most of the time though, I tend to photograph the deep woods with the intent of converting the image into a black and white.
Deep woods settings do tend to lend themselves well to black and white, however, depending on the kind of light that is filtering through the green canopy, this too can be tricky. Often you will encounter a wide range of contrasts ranging from very dark shadowed areas to very bright sunlit areas. This range more often than not becomes the problem as the camera simply cannot deal with that wide of a range of contrast. You will lose a great deal of detail in either the light or dark areas with one or the other being blown out.
Most times I will shoot with a circular polarized attached to my lens. This helps to reduce the glare and allows for a certain amount of control over the lighting. I will also usually expose for the brightest areas and let everything else simply fall where it wants to within the exposure. I do this by shooting on Aperture Priority and then using the +/- exposure compensation to bring the brightly lit areas into an exposure range where detail becomes apparent. Then during post processing I will bump the mid-tones and dark areas up a bit to bring the image exposure more inline across the full spectrum of what was captured.
HDR is of course another option, where you take a series of images using different exposure values and allowing the software to blend them into a finished, more evenly exposed image. As this blog is mostly for novice and less experienced photographers, I'll leave the HDR discussion on the table for another time, but I will say HDR, although it has its place, is better suited for certain kinds of lighting situations like inside a Cathedral. The idea with a photograph in my opinion is to make it look natural and HDR, unless it is expertly crafted, can often make the image appear a bit "Over Cooked".
Many times, photographers at all levels will make the assumption that whenever they are photographing something, they must capture the scene as though it is an exact replication of what was seen. Yes, sometimes this actually does work, however, creative photography allows for you the photographer to capture less about what you see visually, and more about what you felt while you were there. This is open to interpretation by each photographer, but photographing the deep woods is a perfect opportunity to explore this concept.
What you want to accomplish is to create an image that imparts that sense of place and wonder. The Deep woods is often filled with both, but you have to not only look for it, you must feel for it as well. Sometimes it is just a momentary glimpse, the way a tree hangs out over a creek, they way a large boulder fills the frame, or how the trees themselves line up...or any other number of ways.
Photographing the deep woods can be one of the most inspiring and challenging of photographic opportunities. Just keep open the idea of capturing what you feel and look for those compositions that reveal the essence of the woods you encounter.
When I started one of the most interesting photographic projects I've ever tried, The Ansel Adams Style Project, I wasn't sure where it would lead, but discovered along the way just how important a project like this can become. I never believed I would ever attain the prowess of the name sake of this adventure, but this project proved itself not only fun and rewarding, but instructional and revealing. What the venture taught me will be carried forward in my seemingly never ending quest to capture that one perfect image and hopefully provided a measure of inspiration to continue pursuing this fascinating form of photography known as Black and White.
I've always been a huge fan of black and white photography having had my early development as a photographer heavily influenced by its nuances. More often than not though most of the time in more recent years I simply would take color images and realize later how they would actually look better as a black and white, then convert them. The Ansel Adams style project forced me to look at the world through a black and white filter to do what Ansel learned during his development as a photographer, to visualize the outcome before ever snapping the shutter.
Visualization. A process of knowing the results before they occur. It is probably the most difficult aspect of photography for most people to fully grasp. Even experienced and technically competent photographers often struggle with its significance. Yet, it is one aspect I have attempted to refine over the years, not always successfully, but in a manner where I begin to experience the excitement of creating what I see in my minds eye.
Along with Visualization, I've always tried to live within the creative confinement of the art form, looking for light in all of its forms. Doing so sometimes causes one to drift toward being, dare I say, a bit depressed, because, well I do not always find the inspiration to create what resides within all artists. Searching for such things can become a bit futile when attempt after attempt falls short of expectations...and then...all of sudden, it falls into place. One such moment occurred during this project when I hiked into Shanty Hollow and discovered to my delight one of the most dramatic moments of light I've ever encountered. These are the events that make it all worth the effort, when stage, moment, and light converge to present the delicate flavors of nature in a magnificent encounter.
Worth all the effort? Actually, the effort came naturally, what was revealed was just how important it is to try something new every once in a while, to jump start creative instincts, to reopen the imagination,and to even relive and re-experience what the great masters might have accomplished.
What I outwardly gained from this project I can only share in a feeble attempt at writing about it. What was truly gained resides inward in a deeper context of revelation and accomplishment. Rarely am I moved by the photographs I take, yet somehow when I view the haunting image taken within Shanty Hollow, I understand more fully why I started the project in the first place.
The Ansel Adams project started as a "let's see what turns up" kind of adventure. It finished as one of the most inspirational and exciting projects I've ever attempted. Even though I've set it aside as an exclusive project for now, it's really not over, for I will continue to explore this fascinating form of photography. Who knows, maybe that one great photograph I've been chasing will be generated from this ancient form of photography captured in a most unlikely place.
Grumbling, I picked myself up from a rather ungraceful fall after just encountering a loose rock strategically placed on the down slope side of the trail for some unsuspecting soul to step on. Then I continued on my way and limped to the bottom of the Shanty Hollow Falls ravine and stepped onto the gravel banks of the outlet creek.
It was a bright sunny day, not the best kind of day usually to photograph within a heavily wooded area. The bright sun poked its rays well into the ravine creating a great deal of bright hot spots and dark contrasty shadows. At first I simply surveyed my surroundings and grimaced at what was there and started to reluctantly take photographs at what at first seemed to be rather nice looking compositions. Upon closer examination I realized what I was capturing fell well short of what my eyes were seeing. After several more unsuccessful attempts, I stopped and simply stood motionless, just staring at what was in front of me trying to figure how to visually make sense of what was there. Nothing seemed to work photograpically, then, I remembered an old photographer's trick...when it's not working, turn around... And so I did.
To my amazement what I saw set my photographic juices to flowing as the mid-day sun applied a brilliance of light to the leaves whose incandescence filtered deeper into the ravine to cast a glow across the horseshoe shaped amphitheater. I have often said that a photographer sees with his heart, and my heart was moved when I saw how the ravine was alight with an almost unnatural luminosity. It was amazing light, like none I had ever witnessed before and I instantly understood how here in front of me the natural world was to reveal the best of what I had hoped for. Photographing it proved a challenge because of the heavy contrasts, but I knew the results were going to be exciting. I found this revelation to be fitting because I was there following up on an Ansel Adams Style project where I wanted to capture nature in the same kind of style Ansel Adams might have used.
He once wrote about how the light he encountered in the high Sierra's set him on the path to becoming a photographer. His life changing words were filled with inspiration and insight and revealed a deeper understanding of what his purpose was to become. The light I encountered on this day had a similar effect, maybe not so dramatic as what he became, but the powerful, revealed light within that ravine spoke to me using natural, visual words of insight.
Sometimes photographic moments do have simple solutions. We just need to remind ourselves about the simplicity of doing something like turning around and looking in the other direction. Whether shooting a sunset, a rain squall, or from inside a shaded ravine, looking the other direction often reveals something new and unique.
Too often I find myself locked into a single way of thinking about the results I expect from a photo shoot. In reality, it is only when I let go of preconceived notions does the real opportunity reveal itself. Turning around and looking the other way sounds so obvious, I am amazed at how often I fail to apply such a simple solution to the bigger problem. Light is, as always, what I want to capture, not objects, and by first looking for the light, the purpose of the objects suddenly come to life.
I used a polarizer filter to reduce the glare, and held a graduated neutral density filter to the front of the lens to help balance the brighter upper portion with the darker shadowed areas. After several shots, I knew I had captured a remarkable moment of light and could not wait to download the results. I turned around again and carefully made my way out of the ravine.
Photographing the night sky has become one of the fastest growing types of photography. Using even basic equipment and a little knowledge of the night sky once can capture some fascinating objects. In recent years I have spent more and more time chasing the night photographing subjects like the Milky Way center, and few planets like Saturn and Jupiter along with a few deep sky objects like Andromeda.
Perseus Double Cluster
Most of my images fall well short of what is possible when you combine quality photographic equipment with very dark and scenic night sky areas, but they are still fun to do and what makes it most enjoyable is because it is "now" real time.
One of the most intriguing things to do when photographing the night sky is to simply point your camera toward a dark area and see what you get. Most of the time it will simply be a scattered collection of stars spread across your field of view, but sometimes you discover some interesting sky objects.
Beehive Cluster
Star field photographs are just that, a photograph of a random series of stars. What makes them intriguing is the patterns they create. Stars of course are made up of a variety of types and colors with some being red, some bluish, some yellow, and some white. The colors do have a meaning with the various tones indicating how hot they are and in some cases how large they are.
When you find clusters of them, well now you have discovered a real deep sky object. Some of the more famous ones include The Beehive Cluster, and the Perseus Double Cluster, along with Pleiades or also called the Seven Sisters. These are beautiful clusters and reveal just how amazing is the night sky.
I will not get into all the techniques involved, just wanted to write a simple post and share some of the more fascinating images I've managed to capture. More information can be found within this blog by doing a search using Night Sky as a key word.
Light becomes its most surreal when a photograph is viewed in black and white. It is as though whatever it falls upon becomes wrapped within a veil of luminosity that is at once unique and familiar, yet it carries within it a vibrancy that transcends the distraction color imparts on an image.
Keith Bridgman Photography
Ansel Adams, probably the best known American Photographer of landscapes, captured the color of the American west almost exclusively in black and white. His influence travels far beyond his mastery of photographic technique and impacted the age of conservation awareness like no other person. His images stirred the imagination into action and transformed a nation who at the time of his greatest works was struggling to climb out of a great depression. His genius was second to none, his eye for detail defined modern photography, his visual influence changed a nations understanding of who it was.
I have long enjoyed black and white photography ranging all the way back to my youthful earliest days of using a very old Kodak No. 1 Brownie camera my grandparents once owned, and developing those negatives and small prints inside a closet darkroom. It was magical to watch the image transform within the chemical trays. They were nothing more than simple snap shots of my day, things like our pet dog, or the car in the driveway, or a pool of rainwater reflecting light across its surface. The foundation of my photography was laid during those days and in spite of the modern technology available today, those simple images serve to remind me of my photographic roots.
Keith Bridgman Photography
I first learned about Ansel Adams when I was a college student, although I had seen several of his images previous to that time. His story fascinated me even then at how he transformed from taking snapshots using the same kind of Kodak No.1 Brownie camera I had also used, into one of, if not the foremost authority on landscape photography. I would sit in the library and peruse though a book containing some of his images and was mesmerized by their clarity and stark beauty never once believing or even thinking that one day I would attempt to capture images in his style.
The Ansel Adams project is simply my attempt to rekindle some creative energy by going back to the basics of photography. I could never imply that I would ever match the power and impact of his images, but to shoot in his style forces one to backtrack creatively and to see the world in a different perspective by looking at the world based on the contrast and light created by shades of gray.
Shades of gray, it sounds so simple, yet in reality capturing the world through the eyes of black and white is more difficult than it seems, for you not only must recognize the intrinsic photographic value of a landscape, you must also look beyond the visible clutter color imparts on a scene and see it as a series of contrasts and shades. Then, for this project at least, I must visualize not only the potential, but the technique Ansel himself might have used to compose his images.
Keith Bridgman Photography
For thirty days, I will add to my collection of black and white images and explore photographically the world close to home shooting nothing except landscapes and other points of interest using the Ansel Adams style. It is perhaps is one of the most unique and challenging projects I've ever attempted, yet one where my excitement level of the potential that may develop is as high as the Sierra Mountains where Ansel created some of his most enduring images.
Nature in all of its forms offers the photographer an unending array of photographic events. Capturing nature effectively can often prove to be an elusive endeavor, but we keep trying, keep pursuing the art of photography until at last we discover that one magical moment. Composition plays a vital role in being able to capture magical moments and effectively using composition to portray your vision can be influenced by some basic understandings like using one of natures secret weapons; The S-Curve.
Taken using a disposable 35mm film Camera
The S-curve in a scenic landscape serves to move the eye, to lock it into what is important. It leads the viewer toward what you the photographer wants them to see. When anchored between blocking compositional elements such as a darkened treeline or a distant ridge or even a shadowed hillside, the S-curve then becomes the most important part of the image. Those blocking elements serve to keep the eye from wandering off the page so the story line then becomes more condensed and is no longer simply a portion of what you are seeing, it becomes the main focus of why you are even looking.
S-curves can be bold and dominant, or more subtle and suggestive. Regardless, they serve to take your eye into the image. They can provide a platform upon which the remainder of the composition resides. It is important to include them with other strong elements that compliment the reason the S-curve is there. Other building blocks serve to frame the image to isolate the importance of the curve. You the photographer must then position yourself in the most advantageous location to take advantage of the natural flow of the curve.
Light can also influence the nature of the S-curve. Used effectively, you can actually create a curve that may or may not be all that noticeable. Blended with blocking shadows and framing elements, then allowing the light to glow across the image toward the viewer is an effective way to render how S-curves tell the story.
It takes an experienced eye to see past the chaotic distractions and to focus in on what is important. Visualization is key here, where using your knowledge of how the camera captures light, you are able to generate the desired emotional balance that so effectively stops a viewer and keeps their eyes on the story you wanted to express.
Over time the process become instinctive and you feel the situation as much as you see it. You begin to look beyond the obvious and drill into the sublime to see the finished product before you ever take the shot.
When this begins to happen, you pass beyond accepting the ordinary to dwell within a realm where creating the extraordinary becomes a part of why you are a photographer. Using natures secret weapon, the S-curve, just makes life as a photographer a little bit softer.
I am probably my own worst critic when it comes to evaluating the photographs I've taken and that is probably a good thing for the most part. I am constantly looking deeper into an image to identify what works and what does not work. By doing so, I feel like I've gained a great deal of discernment about what makes a great photograph. Along the way I've also learned just how wide of a gap exists between what I think vs what other people think. Although I do value evaluations from others, I don't always agree with them simply because they were not there working under the conditions at the time and they simply do not know what your intent was in creating the photo. Those things do affect the image. So, critically evaluating your own photos becomes even more important and doing so helps you recognize what works for you, and that after all is what is most important.
Taking time to critically evaluate your own photos will often reveal inadequacies in your technique especially the lighting, but it also includes composition issues. Evaluating your photo's can take any number of paths, however what I find most useful is to ask myself two questions.
1. What works with this photo. 2. What doesn't work.
Then I begin to drill into the image breaking it into components and separately evaluating the merits of the different segments. By using this simple approach you will be able to focus in on what is important. The answers to these two questions will certainly vary with each image, but, one answer I always avoid is to simply say, "I just like this picture." An answer like that does nothing to improve your critical eye. Even so, every image must pass the "Eye Test" first even before you begin to drill down into the merits of the image. If it doesn't pass that preliminary eye test, well...maybe you should move on to another image.
Let's take a closer look at the photo above and try to answer these questions, just to give you an idea of how it might be done. Of course everyone is different, but the idea here is to develop and improve your own critical evaluation tools.
What works with this photo? First of all, let's look at the "Eye Test". Their expressions work very well here. Mother and Daughter show a genuine connection to each other through their embrace and by doing so they are projecting a positive connection to those who might view the image. They both have nice genuine smiles and do not appear to be overly "posed". The background is plain and does not interfere with the overall composition, and there appears to not be any overly glaring elements that stand out. To me, it passes the eye test. From a technical point of view...The lighting is pretty good (Two speedlights were used). They are well lit with no extra glare coming off the mothers glasses. The whites show detail as do the darks and midtones...and there is a good range of whites, midtones, and darks scattered across the composition. The back lighting is soft and not overwhelming but just enough to provide some highlights across their hair which helps to separate them from the background. The focus is on them with the background just out of focus. Compositionally, they are spaced slightly to one side within the frame and they appear as a natural fit within the frame as well. What doesn't work? The Eye Test...I would prefer the mothers hand which is spread out and lying across the top of one of the large rocks, would not be so widely spaced. It should be more curved inward and lying naturally on the rock instead of looking like it is supporting her arm. There is also a bit of a "Hot Spot" in the upper left which could distract the eye away from the main subjects. However it is somewhat balanced by the whiteness of their tops and the softer middle values of the rocks especially on the lower right. From a technical point of view...Overall it is good, not much I see technically from this image that distracts from the image except their faces are a little soft and the eyes are not quite as sharp as they should be. This is possibly caused by the Gaussian Blur that was added to the image and then removed across the faces. The GB is what created that softer background look...a nice addition but can create a too soft look if not carefully applied.
So...you get an idea of the thought process I go through when I evaluate an image. All of the Positives tend to be strong elements but always can be improved, while all of the negatives are easily corrected. It is a matter of applying what you learn from an exercise like this to your shooting in the field next time. It is something you must make a conscious effort to do at first and eventually you will begin to instinctively see these things before they happen. This technique can be applied to any kind of photograph, so give it a try sometime.
Ansel Adams, one of America's greatest photographers, once provided some critical insight about one of his earlier photographs. He called it a product of "Confused Seeing". His critical insight focused on how the theme of the photograph was not clear...there were too many competing elements with one particular element providing a distraction to the overall impact of the image. Oddly enough, this is a common problem for all photographers, even experienced ones. Sometimes we get so caught up looking, we fail to spend time seeing what is there.
Composition is a workshop-required element of photography and a simple blog post such as this will never provide enough space to cover all of the intricacies of the subject. However we can take a look at the concept of carrying your theme all the way through you image.
First of all, one of the most important elements of a composition is to create a theme for the image. Simply put, the theme is what the image is about. As a photographer you are attempting to show the viewer why this moment was important to you. Capturing it then requires you concentrate the composition in such a way as to eliminate all of the distractions that might interfere with the viewer being able to interpret what you are presenting to them visually.
The photo above is a good example of how a theme is carried all the way through the image. There are no distractions, everything in the image is there for a reason, and everything falls into place. It is also a good example of simplicity. There are just three elements here, the sky, the background hill, and the water reflection. Even the colors compliment each other. It is no coincidence how simplicity and carrying a theme all the way through tend to define the subject.
The photograph on the right is a good example of "Confused Seeing". On the surface it carries an element of appeal. I saw something here that warranted a second look, however, the capture fell well short of what I wanted. There are so many competing elements it is difficult to focus in on what the theme is suppose to represent. Is it the tree(s)? Is it the rocks? Is it the Misty haze? Certainly it is not the light as it is flat and bland. Hard to tell on each of these points.
The difficult part is learning how to see. Simply looking at a scene, like I did with this one, is not enough. You must observe beyond that confused instinct and focus in what is truly important. Ask yourself, "What is capturing my attention? Where does my eye want to go"? More often than not if you can answer those two questions, you will be able to discover the best theme from that moment. The trick then is to focus in and create a composition that captures that theme. You may have to move around, change lenses, change your angle or camera orientation. You might even have to wait on the light, or even come back another day when the conditions change. There are risks doing so, however most of the time your trained instincts will prove correct and with better light you will capture a more powerful image.
The photo below is a good example of how to focus in on a single element. It is just a part of a fallen tree limb that fell into a pond. My confused instincts wanted to capture the whole pond and the entire tree limb. Needless to say, the first attempts at doing so fell well short of expectations. Then I stopped for a moment and asked myself what stands out...where does my eye want to go? The answer was this photograph. I used a longer focal length lens to compress the image, to isolate the main subject and blur the background, but I used the continuity of the green background to help provide a soft contrast and frame the tree limb. The theme of the moment was carried all the way through and the basics of photography combined with focused seeing resulted in a nice photograph.
Eliminating Confused Seeing requires time and practice to perfect. It is one of those intangible elements of becoming a better photographer we all must learn how to apply through trial and error. Simply knowing about the concept helps, yet you must take the time to look beyond what your "Confused Instincts" tells you to do, to train yourself to utilize a more focused portion of seeing photographically.
Some years ago I watched several video's by Dewitt Jones, a former National Geographic photographer and motivational speaker. The one thing I most gained from his video's was when he said "Be willing to place yourself at that point of greatest potential". It was a concept that has served me well over the years as I took to heart his advice as I have attempted to place myself in a position where I can capture the best possible light. It has not always been easy and sometimes it was down right rough as the requirements to be in the best possible location at just the right time often required a physical hike and a great deal of mental effort. Regardless if the hike is across a parking lot, a pasture, or deep into the interior of a grand landscape, knowing how to rough it easy becomes an essential part of becoming an efficient photographer.
Taking a Photo Hike can offer a great deal of opportunity however, Photo Hiking like this takes on the same safety and comfort requirements as any kind of hike across country, you just have to also carry along your photo gear. Yet, as a photographer there are equipment requirements you must have in order to cover all the possible scenarios you might encounter. It would be impractical to carry all of your equipment as it would load you down so much you would actually lose time trying to keep up with it all. But, at the same time you want to carry enough gear to cover a wide range of possible scenarios. As a consequence it becomes a juggling act of what to bring and what to leave behind.
For me then, it becomes a matter of understanding the requirements of what I expect to encounter. If the mission is to capture a prairie sunrise, from experience I understand how I need three obvious things for sure. My camera, a wide angle lens, and a tripod. However, I also know I might encounter other opportunities while on site. For instance, one of my favorite locations to capture this kind of photograph requires I do some short hiking and thus requires I use some kind of equipment bag to carry my gear. Most times I will simply use my camera gear pack which holds way more than I need, but also adds a lot of extra weight. Sometimes I simply use a fanny pack because it is large enough for everything I need for that kind of shoot plus it retains the ability to carry a few extra luxury items. It also affords me the ability to toss in a cable release, graduated filters, and even a larger focal length lens...just in case...and a water bottle.
It may appear self evident, but by limiting the gear I tote along, I simplify the process and reduce the amount of the required physical effort. Then there are the times I plan on making a much more difficult and longer journey. Again, taking the prairie as an example, there is a rocky arroyo tucked away in a somewhat hidden location I will often hike into, but it is a mile or more from the access road. Hiking in there covers some rough terrain and because I will be in there for up to several hours, I need to cover all of the contingencies like the possibility of rain, hot weather, plus any of the unknown but potential photo opportunities. That also includes something to drink and an energy snack to get thru the day.
One such unexpected event occurred several years ago, one in which I was unprepared for what I encountered. I wanted to make that hike but it was hot and I did not want to lug around a heavy gear pack, so instead I packed my fanny pack with my camera and one lens, a 35mm to 105mm, and a water bottle. That was it. After the hike in, I sat under the shade of a cedar tree when I noticed two coyotes milling around about 200 yards across the arroyo. With them were two fluffed up and very new pups who looked like they were exploring their environment for the first time. I needed my long 500mm lens but because it was heavy I opted to leave it behind. The 105mm just did not have enough reach and proved inadequate for the job and as a consequence I missed a great opportunity to effectively capture a unique natural event.
During the year I will spend a good amount of time exploring the night sky and capturing the hidden beauty found there. It also requires at times a certain amount of mobility and thus a degree of planning. For this kind of shoot, not much is required as far as the basic equipment, a tripod, camera, and wide angle lens, plus a cable release. With just these simple tools you can capture some amazing night sky photographs.
However, I'm never long satisfied with the basics. I need to push the envelope and experiment and thus I built a barn door tracker device to track the night sky and thus allow for longer exposure times. This device is bulky and a bit cumbersome to operate. As a result I tend to use it mostly in my backyard, but I will on occasion tote it along to another location site. It does require I strap it down inside my vehicle to avoid it falling over, which it has done before. But, again with a little planning and understanding the requirements of the shoot, I have educated myself on how to simplify the process. The idea is to have a plan and outfit yourself for that plan. By limiting all the extras and focusing on just what I will need for that particular shoot, the shoot then becomes much more enjoyable and manageable. Also, by pushing the envelope you force yourself to learn more about what it is you are trying to do and how to accomplish the task. This alone helps you to know what to bring along and what to leave behind.
Shooting on location often requires the use of additional equipment like speed lights and stands along with a softbox or two and such. My equipment pack is quite large, too large really for routine use, but when you need to carry extra gear, it's very largeness is ideal. With it I can keep all of my camera gear in one convenient location and extract what I need when it is needed. The traditional camera bags tend to be somewhat cumbersome and too small to carry a lot of extra's, plus you might need more than one which makes keeping up with the stuff more difficult. It's all a matter of understanding what your purpose is along with the gear requirements to fulfill that purpose. By thinking through the process ahead of time you are more able to focus in on what you are trying to accomplish. As a result the effects are often encouraging.
Simplifying what you carry into the field is an important part of becoming an efficient photographer. Learning to adapt to changing environmental conditions is a process of experience. Sometimes we get it right and sometimes we do not, but with each attempt you learn more and more about how to rough it easy.