ESTABLISHED 2010 - Beyond The Campfire was created to encourage readers to explore the great outdoors and to observe it close up. Get out and take a hike, go fishing or canoeing, or simply stretch out on a blanket under a summer sky...and take your camera along. We'll talk about combining outdoor activities with photography. We'll look at everything from improving your understanding of the basics of photography to more advanced techniques including things like how to see photographically and capturing the light. We'll explore the night sky, location shoots, using off camera speedlights along with nature and landscape. Grab your camera...strap on your hiking boots...and join me. I think you will enjoy the adventure.

Monday, November 5, 2018

A Look at Fall in Kentucky

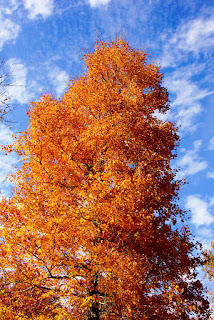
Every year plays out a different yet familiar dialog where the summer seems to linger and hang on well past the time most of us are ready to let go of it. September rolls around and we begin to see hints of what is to come. The evenings begin a progressive change from sultry to a welcoming coolness, wayward breezes search for the tops of trees, and the aroma of fall begins to prevail. Some of those trees develop a promising change of color, very subtle at first but as each day progresses, more and more yellow, a splash of red, a touch of orange infiltrates the landscape. The autumn harvest is in full swing as farmers tend to their fields stirring dust into the cleaner air as the combines do their work. Then October is upon us before we know it, yet the grasp of summer lingers seemingly never to let go until one day, near the end of the month, virtually over night the landscape explodes into a senses engulfing kaleidoscope of color. Fall in Kentucky has arrived and with it begins the photographers delight.


I actually enjoy all four seasons and especially those transitional times between seasons, but perhaps fall is my favorite, for with it comes probably the most dramatic change of the year where the prevailing green of summer explodes into the reds, oranges, and yellows of cooler weather. These color contrasts become a haven for photographers and capturing them becomes an obsession. Photographers become almost neurotic because they know the season is short and within a few days most of the color will be gone. So, we photograph in haste, searching here and far for that special moment of season defining light.


We develop a sixth sense where at a glance we spy unique blend of sky, color, and light across a field or hovering over a small back road stream. We travel the back roads with shifting eyes catching for an instant that one shot...then drive too far only to turn around to find it again.


We look closely into the trees and discover single leaves that speak to us about their last days of glory filled with a final vibrant message of color.

We zoom in close and isolate those moments, and then the next moment we turn around and recognize the contrasts of color against a cobalt blue sky.


We listen, we hear, we see, we sense what is happening around us. We are always concerned about the what if's. What if I had been hear earlier, or what if I was at that other location, or what if rains tonight and knocks down all the leaves before I can capture everything I aspire to capture.


Fall creates a neurosis in photographers like no other time of year. And yes, it is perhaps, or maybe certainly is my favorite time of year. I am a photographer and I live for such moments.


Wednesday, October 24, 2018

Adding Pop to Flat Lighting

Window lighting can be some of the best natural light a photographer can use. It offers such a wide range of effects I am amazed more people don't use it. I will from time to time use window light, but sometimes window light can fall flat. Under certain conditions it just falls off so much there simply is not enough light available to effectively light the situation. It may need a little extra pop to push it into the realm of beautiful light.

One way to do this is to use an off camera speed light and a bed sheet. Combining these two things you can take the natural softness of window light and add a level of photographic refinement. Let's look at one image and see how this was done.


On the day this first image was taken, it was a dark and overcast day...rather dreary outside. The family shoot we did was all done inside, mostly using natural window light in a room surrounded by windows on all sides. There was just enough volume of light in that room so we could shoot, but I also added a bounced flash or two along the way to help out. The photo above was taken in another room that had a single large window. As dark as it was outside, the room was even more so with very little outside light filtering through the window. Now, I could have used a higher ISO or slowed the shutter down to use the available lighting, but by doing so the background in the room would also have been brighter. I really did not want that...I wanted the room to remain subdued, but the mother and child be lit.

What I did was actually rather basic. I took an ordinary white bed sheet and taped it to the outside of the window, fully covering the window. I then placed a single speed light on a stand and stood it about 2 maybe 3 feet from the window. The speed light was zoomed out to a wide area focused lighting and powered to at least 1/2 power and could have been at full power, I'm not sure exactly, but it was set to a higher output setting.

I then simply set my exposure for the background lighting insuring it would be subdued and fired the flash remotely at the camera from inside the room. What happened was this. There was still some light filtering in from the window, but the speed light shot against the bed sheet created a large diffused source of light, giving what was already there just enough pop to light my subjects without altering the look of the darkened room.

Adding a little pop to your natural lighting can enhance the image. The trick is to not overwhelm your image with too much light. Using speed lights requires a bit of imagination and a soft touch. The light provided by them should be used to enhance what is already there and your image should never look like you used an old fashioned flash cube.


Friday, October 19, 2018

Story Telling Inside a Photograph

I walked somewhat sleepy-eyed along the gravel road, a road whose path wound its way toward an old country home tucked inside a gaggle of trees. It was late fall and the once dormant chill excited by a stiff wind engulfed the air surrounding me. The first light of the day was held in muted bondage by low hanging overcast that dipped close to the ground floating along pushed by the invisible hand of an approaching winter. The morning looked and felt gray. In the field to my left the rustic looking remnant of corn stubble stood as a testament to a successful harvest. On either side of the road an old fence row stood lined up like historic monuments to a time from the past.


About half way down the road a beam of the first light of the morning broke beneath the clouds and cast a cheerful glow across the home, the trees, and the tops of the the corn stubble setting the grass alight within the realm of the prevailing grayness. I positioned my tripod and camera composing the scene through the view finder, and released the shutter. A moment later the beam of light retreated back into the clouds and I was again alone standing on a country gravel road.

Photography is as much about telling a visual story as it is about capturing a moment in time. To capture a story one must first not only see what is there, but be able to feel the emotion of what surrounds you. It is the emotion of the moment that tells the photographer when to release the shutter and when you finally do, you instinctively know something unique and even amazing happened.

The visual story of a photograph may possibly be the most difficult element for a photographer to capture for it does not always willingly reveal itself. It is something you must seek out and to allow what is there to speak to your senses. Sometimes, it just happens. Most times it takes work and a willingness to turn off your other senses and allow your heart to grab hold of the story. Everyone must discover within themselves the necessary elements of how the world reveals such stories to them. It is not something that can be taught, only reminded. It is a personal reward well received, well worth sharing.

Sunday, October 7, 2018

The Aviator - How It Was Done.

Several months rumbled by from the time we agreed to attempt a themed photo shoot I call The Aviator until we were able to arrange our schedules so we could actually give it a try.  I formulated the concept back in the spring when I spent several evenings photographing all of the aircraft on display at the Aviation Heritage Park here in Bowling Green, KY. One of my favorites was the one of the classic F4 Phantom air superiority fighter which was featured in a previous post. The idea of the aviator theme photo shoot was to duplicate as closely as possible the same lighting technique used on the F4 then add in an additional element of a model dressed in some kind of aviator outfit. This additional element complicated the lighting requirements significantly, but I believed the overall look of the image could be really nice.


First of all capturing an image like this one with the same kind of lighting is virtually impossible in a single photo. It requires multiple images that are blended together into a single new image. Please read the post "Shaping Light to Fit Your Subject" to see how all the blending was accomplished on the original F4 image.  So let's take a quick look at how The Aviator was made.

There are four images used to create this shot; three actual photos plus a supplemental blank image used in Photoshop Elements to clean up some background clutter. The first image was to build a bubble of red light reflecting underneath the airplane. Four speedlights were used, two clamped to each wing with the two inside lights using a red gel...that's where the red light comes from. The two outside lights were bare lights.


The second photo used a single light attached to a C-Stand extended upwards and angled to point toward the canopy. The four wing lights remained attached. This is where this image deviates from the original F4 image which used two lights for the canopy shot and no wing lights. Two lights would have been better.


Notice how the red lighting across the tarmac is washed out. This is why you must use multiple shots because the different angles of lights begin to work against each other and cancels out much of the dramatic effect of the light. Also note the camera is on a tripod and once the composition is made the camera is not touched or moved through the various shots. This is to ensure they all align properly when the blending process is applied.

The third photo retained the wing lights and a single light on the C-stand, but the light had a Snoot attached and was adjusted to illuminate our lovely model Sophie. The Jump Suit she is wearing is an actual NASA jump suit worn by an actual astronaut. I thought it was a perfect addition for the theme of the shoot.


Notice how the exposure was adjusted slightly for our model which darkened the red bubble of light. This is okay because for the second and third images, the only lighting that mattered was the canopy and the model. However, that remnant red bubble serves to help in the blended process.

The first step was to blend the first and second images to combine the canopy shot with the red bubble shot. A simple Select All and Copy was used on the canopy shot. This was then pasted on top of the Red Bubble image creating a top layer. Using the Erase tool, the bottom half of the top layer was removed to reveal the Red Bubble exposure underneath.


To clean up the background a blank black image was used as a new base image with the F4 photo pasted on top. Background clutter is simply erased out revealing the black underneath. A few slight tweaks of brightness and contrast and saturation and then this image was saved as a blended shot. This shot then became the base background image for the next process.


The third Model shot was then Selected and Copied and pasted on top of this blended image. Again using the eraser tool, the entire background of the shot was removed to reveal the bottom layer taking great care around the model. The brush size needed to be adjusted to a small size to allow for some detail erasing around our model. Both a sharp edge point and a soft edge was used to blend the area around our model so it appeared natural. The most difficult part was to include and blend her shadow into the red bubble light. A few more simple Photoshop tweaks and we have the finished image.


Thanks to our model the lovely Sophie and her mom for helping out on this shoot...They were real troopers on a warm and muggy evening...it was a lot of fun and I continue to learn more about using this multiple image technique to create interesting and unique themed photos. An extra thanks to the park ranger who allowed us another 30 minutes to finish our shoot.


Wednesday, October 3, 2018

A Photographers World: Hidden In The Chaos

Not so long ago I wrote a post about the Neurotic Photographer and how being one often proves an advantage over not being one. As a result I have learned how to look at the world through neurotic eyes, but even more important is being able to see beyond the clutter of nature's chaos. Hidden in that chaos one will discover intricate details illuminated by the various moods of light.


The world is filled with all kinds of visual chaos most of which interferes with our ability to isolate what is truly important. Being able to visually focus on what is actually capturing our attention requires employing a practiced skill. Novice and sometimes even accomplished photographers often fail to look beyond the obvious and tend to see only the big picture. But over time they eventually begin to realize how the big picture consists of a series of smaller moments of light. It is often these smaller moments of light that becomes the true photograph. Being able to wade through the chaos of the big picture and find those hidden smaller moments can result in the capture of extraordinary images.

Although Macro or closeup photography is a fascinating form of photography and certainly could be considered a part of what I am writing about, I am not specifically referring to just those kinds of tightly focused photographs. Sometimes hidden inside the chaos of the big picture resides a slightly more refined composition. The idea is to see what is truly there...to resolve your vision where you recognize that sliver of light opportunity that not only reveals what is the most important element of what you are seeing, but tells the larger story from a smaller perspective.


The photo above is a good example of this concept. Taken inside a congested wooded area on a very bright and sunny morning, visually the area appeared rather chaotic and cluttered. To the eye it looked very woodsy, but our visual acuity is able to separate and blend a wide range of light and dark contrasts. Even the most advanced cameras cannot do that. You end up with hots spots or washed out areas that eliminate the dimensional depth of the scene. Isolated on a stump was a graceful clump of grass illuminated by a single beam of morning light. This one moment of light told the bigger story of that wooded area in a dramatic yet simple composition.


Within the same wooded area you can discover a magnificent canyon with a wonderfully lively waterfall dropping from the apex of a horseshoe escarpment. It is truly a magical place to photograph as it provides a myriad of different looks. Once again, you might find yourself concentrating on the most obvious part of the scene, the waterfall, but, trying to capture the entire scene from that canyon can be a daunting trial. One particular fall day I stood near the base of the escarpment trying to compose an image with the waterfall as the main ingredient. Nothing was working, until I focused in on where my eye kept going which was a small group of trees with red and yellow leaves boldly accented against the gray stone face of the escarpment. On this particular day, that was the photograph I was looking for, I just did not see it at first because I was so fixated on the obvious, and failed to look for what was truly capturing my eye.

The first photo at the top of this post is another example of seeing what is hidden in the chaos. Sometimes it is not always a smaller view, it can be a wide view. The trick then is to simplify the composition and visually eliminate what is not needed. What caught my eye first were the reflections. By moving my location and arriving late in the afternoon just before sundown, I was able to position the two barns and capture a wonderful example of Kentucky back roads. Converting it to black and white and applying some creative cropping created a strong dramatic look. Within this image are several smaller images, smaller pieces of the composition, yet when combined within a wide overall view, those isolated smaller portions served to create a nice composition.

Sometimes we try to complicate the process by capturing everything in one image, but trust your eyes, they will point you to what is important. If your vision keeps returning to a particular spot, then something is there capturing your attention. Allow your instincts work for you.


Thursday, September 20, 2018

The 'Natural' Light Box

Light possesses many moods, so many in fact it becomes difficult to define all of them. As photographers this abundant moody light resource becomes a treasure trove of opportunity because light in all of its moods is what we use to create images that serve to stir the soul.


We are taught as photographers the best possible light is usually found early or late in the day. As a general rule this is true, however, great light is where you find it no matter what time of day even if it is during the middle part of a bright sunny day. Finding great light in the middle of the day can be a challenge but knowing where to look can improve your chances of success and open photographic opportunities regardless of the time of day. A good place to start is to look for those Natural Light Boxes where you can capture interesting details without having to worry about harsh bright spots or high contrasts.

A light box of course usually refers to an actual box where you place objects of interest and then flood it with a soft even light using various techniques. They can be painted black or white and even colored and are a great way to shoot indoors. A Natural Light Box serves a similar purpose, except it occurs naturally and offers a great way to shoot outdoors even when it is bright.

What you look for are recessed shaded areas tucked into some kind of cover. The first photo above was taken within one of those tucked in shaded areas during a bright sunny day. A big bright sunny sky acts like a huge soft box and fills in the shaded area with a softer form of light than direct sunlight will provide.  The idea is to look for an open tucked away spot yet one that is exposed to the effects of the soft box effect of the sky. Sometimes you can help things along by using some kind of reflector to bounce a small amount of soft light into your subject or even a piece of foam board to provide a bit more shadow if there is too much sun filtering through.


The photo above was taken late one morning while the dew was still collecting on the blades of grass. There was a lot of sun filtering through the grass, some of which can be seen in the upper right hand corner, but this particular blade of grass sat secure inside a shaded area. I simply used a long focal length lens and zoomed in to capture the subtle reflections from the dew drops.


Your natural light box can be found almost anywhere. The photo of this fuzzy critter was found in an open area that happened to be shaded by a large tree. The background was also shaded and provided a wonderfully soft backdrop for this composition. The photo required some creative zooming and positioning of the camera angle to place everything in alignment, but even during a bright sunny afternoon, good light can be found. Although most any kind of lens will work, I find a zoom lens provides a better platform for blurring the background allowing your subject to stand apart, like the photo below.


Sometimes you want to use direct sunlight to illuminate your subject but avoid harsh shadows and contrasts. A good way to do this is to have the light project through your subject from behind and then align your composition so the subject is posed against a dark background not unlike the collection of leaves seemingly suspended against a dark background seen below. Taken in the early afternoon of a bright sunny day, it was a matter of aligning the branch so the light shined through the opaque nature of the leaves and using a shaded area as the background to make it appear suspended in an artificial setting. The exposure was such the backlit leaves were captured in great detail, but the shaded background area, which was actually a weedy, tree lined jumble, became a virtually black backdrop.


Looking for and using Natural Light Boxes can be a fun and productive way to photograph all through the day. It is just a matter of recognizing what makes for a good light source and then creatively using it. There are as many ways to do this kind of photography as there are people taking the pictures. This kind of photography also serves well for a Walk About photo shoot and can produce some amazing results. Give it a try. I do believe you will enjoy the results.
Saturday, September 8, 2018

The Pseudo Panoramic

Most digital cameras today have the ability to create in camera interesting panoramic images. It is one of those things where you push and hold the shutter release then slowly pan your camera from left to right while the camera captures a series of images that are processed in camera to create a panoramic picture. It actually works rather well and I do use it from time to time myself. Even though there are numerous ways to create panoramic images there is another shot cut you can use to generate what appears to be a panoramic; The Pseudo Panoramic.


The Pseudo Panoramic is simply a creative cropping technique where by you trim the image across the top and bottom to create a wide area look. I run across photographers sometimes who tend to shy away from cropping probably believing this is what the camera captured and that is my image. They may also have a specific size image in mind like an 8 x 10 format or something like that. Certainly this practice is a perfectly rational and acceptable technique one where even I put into practice quite a bit. But sometimes an image serves itself well to take on a wider look.


There is no real magic here or complex formula, its just a matter of looking at the image determining what can be cropped and what should be kept. I typically do not worry so much about the aspect ratio, or size of the image. I just crop it until it looks the way I want it to look. If I need it to be a certain size I will usually create a poster format for a specific size and paste the image onto the background. The idea then is to observe the content of the image and determine how well it serves itself as a panoramic.


So give it a try. Using ordinary size images and making them appear like a panoramic can add a great deal of spark and interest to you photographs.