ESTABLISHED 2010 - Beyond The Campfire was created to encourage readers to explore the great outdoors and to observe it close up. Get out and take a hike, go fishing or canoeing, or simply stretch out on a blanket under a summer sky...and take your camera along. We'll talk about combining outdoor activities with photography. We'll look at everything from improving your understanding of the basics of photography to more advanced techniques including things like how to see photographically and capturing the light. We'll explore the night sky, location shoots, using off camera speedlights along with nature and landscape. Grab your camera...strap on your hiking boots...and join me. I think you will enjoy the adventure.

Saturday, August 5, 2017

Filling in The Blanks with Accent Lights - Lighting a Classic Location

The Corvette Cafe is a classic setting with a nostalgic look and feel to it. When given an opportunity for a model shoot in such a location figuring out how to light it is vital to obtaining the desired results. When combined with a time limit of 30 minutes to complete the shoot, well one must work quickly and effectively to be able to identify those key areas that need a bit more light, a sort of filling in the blanks approach.

The key to good accent lighting is to make it appear natural. What you do not want is to make your lighting look like a bunch of harsh flash cubes have gone off. So, let's take a look at how the lighting on this photograph was setup.


First of all the natural light streaming into and across the room looked pretty good to the eye, but taking a quick photo using the natural ambient light revealed just how dark it really was, especially back in the corners and behind the counter. Way too many shadows and bright spots scattered here and there that made a natural light photo look flat and empty. The room required some help to lift the light where it look natural and exciting. To make it work, I had to strategically place 4 speedlights around the room to provide colorful accents.

The main light was fitted to a 20 x 30 softbox and was situated so it would cast a natural looking light across the front of the model. I set the speedlight to a wide area setting and powered it up to around 1/2 power. This helped to enhance the natural light filtering in from the large windows by the entrance and gave a look to the room where it appeared a strong outside source of light was filtering through.

The main counter possessed a wonderful shiny brushed chrome patina which included the bar stool chairs. There was also a good splattering of red painted walls and the bar stool padding was also colored red which added an exciting vintage look to  the scene. In the far back corner was a recessed booth with a single soft incandescent light hanging from the ceiling. This area proved to be rather dark, so I added a speedlight angled upward to fill in that dark area. A reddish gel was added to provide a splash of color in the background and to help tie in with the red seats and painted walls and to provide a bit of color vibration.

Cafe Shoot Lighting Layout


In order to highlight the chrome and shiny surface of the counter I placed another speedlight to the right and attached a blue gel which cast a wonderfully cheerful bluish tint across the room. This bluish tint was caught and reflected by the chrome and also complimented the models dress which caught a hint of blue across the back edge providing a subtle separation from the background. Her white lacy hat also caught some of that blue light which helped it to contrast and stand out as an interesting compositional element.

The room seemd to vibrate more with the hint of blue light as compared with a more normal white daylight. A fourth ungelled light was placed well off camera to the right and simply angled straight up to fire against the ceiling and add a bit more ambient light across the room. All of these accent lights were powered down to between 1/16th and 1/4 power to provide just a enough light to do the job. Some experimentation was required to find the right combination for each light.

The exciting checkered flag floor added a wonderful balance to the scene and reflected bits and pieces of all the lighting. The area behind the counter remained a bit dark, but all the shiny surfaces caught and reflected enough of the extra light to fill it in enough to allow it to become more visable.

Compositionally, the angle of the shot was critical and the high angle used was simply a spur of the moment attempt to try a different look...to take the image farther down the compositional path. The checkerboard floor and wide angle lens skewed the look just enough to make it appear like leading lines directing the eye into and across the image. In reality, the checkerboard floor is what made the shot, yet it does so naturally and without overpowering the image. It simply looks like it belongs which is what it should do.

So, lighting a scene like this one requires the ability to see the corners, recognize the potential of what is there, and then enhance the natural flavor just enough to give the composition a powerful yet subtle appearance by filling in the blanks with effective accent lights.
Thursday, August 3, 2017

The Quick Shoot - When "Classic" Was Lived (Part 2)

The Corvette Cafe at the National Corvette Museum retains a nostalgic flavor which returns one to the glory days of the 50's diner experience. When the opportunity presented itself to do a model shoot inside this iconic looking location, there was nothing else I could do but accept.


As part two of the Quick Shoot post lets take a look at how we pulled off an exciting throw back photo shoot staged inside this classic looking venue.


One of the prevailing visual elements inside the diner is all the chrome that sparkles like crystal when light falls across the fixtures. As part of the shoot, I wanted to capture this look, but I also wanted to take advantage of the reflective properties one can find inside the cafe. I decided to use 4 lights. One main light with a 20 x 30 softbox used mostly as fill light on our model, again the lovely Katie. I used two gelled lights, one with a red filter and one with a blue filter. These gelled lights were primarily used as background lights to bring interest and color to the dark corner areas. The blue light provided a crisp clean look and was used in some of the shots to enhance the overall contrast against the red background light and to also create some nice reflections off the chrome fixtures. I used a fourth light simply set way in the back and pointed straight up as a bounce light against the lighter color of the ceiling. This provided a brighter ambient light to the overall image.


Again we only had 30 minutes to complete our shoot so we had to work fast. The first setup was to use one of the corner free standing tables and two high chairs. The blue gelled light was placed outside just off the corner of the cafe and pointed through a window so its light would fall across the wall. The red gelled light was placed in the opposite position inside and pointed to illuminate the other side of the wall. My main light with the softbox was positioned out in front at a slight angle and used to fill in the light on our model. The forth light simply bounced straight up from behind. A few adjustments here and there to get the gelled lights to fill in correctly and we made a good number of simple but interesting shots from this corner.

Next we stepped into one of the isles and took advantage of the outside ambient light. We still required a main light as a fill light, but we managed a few 50's biker girl shots. I loved the way the black and white checkered floor created a classic look in these shots. The Black and White version of the images worked great with this setup.


About midway through our shoot we moved over to the counter where a row of chrome high chairs nudged against the shiny front surface of the counter. The background appeared a bit dark so I moved the red gelled light over to the far corner and angled it upward about 45 degrees to create a unique red fill light in a dark area. The blue gelled light was pointed toward the model from the back of the room. This effectively filled the room with a cheerful neon blue cast. The main light with the softbox was placed about 10 feet or so to one side and pointed at Katie and the fourth ambient light simply bounced straight up from a far corner again to provide a little exptra ambient light.

As always, some experimentation was required to get the proper adjustment levels on each light some no one light overwhelmed the composition. The key to good lighting is to make it look natural. These photos turned out rather exciting with the vibration of blue and red colors contrasting with each other, yet it look natural as though a series of neon signs were glowing in the background. We kept the Biker look for a few shots and then had Katie change into her light blue flower dress. When combined with the white lacy hat, her wonderful look was classic 50's. These turned out to be some of the best shots of the day.


Again I tried eye level, mid-level, and ground level shots along with standing on a chair to obtain a high vantage point to look down. What I wanted to capture was a wide-angle skewed look using the checkered floor as a vanishing point that lead toward to main subject.

Before we knew it, our 30 minutes was over and we had to start breaking it down so the good folks who work at the cafe could go home. We had a great time in the short amount of time we were given and much thanks goes to the NCM staff and the Corvette Cafe staff for allowing us to do this shoot. Thanks also to Bill for inspiring the idea and to Katie our model for being a such a good sport. Her genuine and snappy smile really enhanced the finished photos.


The Quick Shoot process I discovered is a great way to obtain spontaneous fresh looks with a portrait model. Being placed into this kind of scenario forces one to work rapidly to set up simple compositions that will retain a nostalgic feel just as though one had simply stepped back in time and captured someone as they might have been.

Tuesday, August 1, 2017

The Quick Shoot - When "Classic" Was Lived (Part 1)

Growing up in the 1950's and 60's created visual snapshots of life adventures from nostalgic events, places, and iconic moments where even today they retain a special place within our memories. Seems like today many photographers are shifting their focus more and more to reproduce images reflective of those years as well as the 1930's and 40's. All for good reason; they were a time when the term Classic was lived.


For the past year and a half or so I've been fortunate to work part time at the National Corvette Museum (NCM), so I am surrounded by restored reminders from those bygone days. One section of the museum is dedicated to Nostalgia where displays are set in period times with the classic cars of those days being the emphasis of the exhibit, and a throw back attempt to recapture those distantly familiar hot rod or car scenes those of us who lived during those times so fondly remember. Also, on the south end of the museum is the Corvette Cafe where one can return to the simplistic days of the old style diner with chrome counters and bold colors to order a good hamburger. It retains the sights and sounds and aromas that at once take us back to those good old vintage days.

When a photographer friend of mine inquired about the possible use of the cafe as a setting for a 1950's model shoot, I jumped at the opportunity to obtain permission to do so. Permission was granted but with some restrictions; we'd have about 30 minutes to do the shoot. That alone makes it difficult as you really do not have much time to experiment, so you gotta know ahead of time what you want to accomplish...thus the idea of the Quick Shoot comes into play.

Actually what happened is that we were granted permission to do two shoots on two separate days; one in
the cafe and one in the Nostalgia section of the NCM. The first shoot was to be in the Nostalgia section during after hours and again we would have about 30 minutes to complete the shoot. A few days before I took a few test shots to get an idea of the angles and how the ambient light worked. This helped to formulate how to position the model well before hand so we could concentrate on shooting and less on setting up the shot.

Our model, the lovely Katie, arrived about 25 minutes before the museum closed and we quickly moved to the Nostalgia section where several classic 1950's era Corvettes were on display in front of a Toy Store and barber shop and in another section, a vintage Mobil Gas station. Lights were set, I used three for the toy store / barber shop shoot and 4 for the Mobil Gas Station shoot.

At the Toy Store / Barber Shop location, one light was set as a backlight and pointed toward the barber shop from the side to provide some extra light on a dark area. Another light was set toward the back in a dark area and pointed toward the model. On it was placed a red gel to provide a splash of color and hint of outline. This effect gave the shot that evening look being set aglow by neon lights. The main light was set in front with a 20 x 30 softbox. I set the red gel backlight on medium power.  My main light with a soft box was set at about 1/2 power, and the third background fill light was set to near full power as it was to broadcast its light across a broad area.
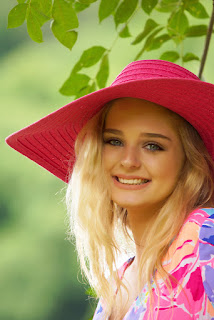

I wanted the shoot to resemble a cross between a PinUp shoot and a Nostalgic shoot with the model performing simple pinup like poses along with the everyday things a 50's era girl might do.


The problem was the angles because there was only a narrow path through which to frame and shoot. I tried eye level, mid level, and ground level looks. I also repositioned the lights to obtain the maximum effect from the gelled backlight. I wanted the lighting to become a subtle part of the story where key accents were used to emphasize the situation. With only 30 minutes or so to shoot, we had to work fast and take chances.

The Mobil Gas Station setting provided a wider array of lighting challenges because not only did I have to light the model, I also needed to light the garage area, the Mobil Pegasus sign, and also provide some red gel light to enhance that night time neon sign look.


Over all in spite of having to work quickly, the effect turned out quite well I believe. Next up will be the Classic 50's Diner shoot...looking forward to it.

Sunday, July 9, 2017

You Know it When it Happens - Photograph with a Purpose

Photographing with a purpose in mind helps you the photographer to focus on the task at hand without getting all caught up in the X's and O's of the game. Many times over the years my photographic efforts have tended to take the approach, well, let's go out and see what happens. Sometimes this works, and sometimes it does not. In recent years I have shifted somewhat away from that approach, mostly, to focus more on creating one single style of image...in other words, I go about it with the intended to purpose to capture a certain type of photograph...a personal vision of sorts.


Photography is about a great deal many things and creating a personal vision ranks very high on the list. Almost every photographer I know develops their own personal style and style in the visual arts is influenced by the personal experiences we all have. In just about everything we do, we can discover analogies that serve to define what we do. For instance one axiom about photography I've learned has a direct connection to all the bass fishing I managed to do over the years. You see, you may find fish-holding structure without bass, but you will never find bass without structure. The same applies to photography. You may experience great light without capturing a great photograph, but you will never capture a great photograph without great light.


Photographing with a purpose does require a shift in the way we go about taking pictures. When photographing people, what I try to do is to continue to take the photo idea further with each photograph. The idea of taking the photo further is something I picked up watching a Joe McNally video a few years ago. He was reviewing and commenting on some photos submitted by individuals. On one particular image he said some good things about it then he said...Don't be afraid to take it further...push it...look for a uniqueness and do not settle when you think you have got it.  


That idea has stayed with me and as I progress photographically, I find myself wanting to do more, wanting to take the image to another level. I try to visualize what my finished product will look like when all the ingredients are there...and when I get there...well, I just know it when it happens...yet I still believe there is always something more I could do.


Monday, June 26, 2017

Sometimes, I Just Wonder

Sometimes, I will browse through many of the previous stories I've posted just to remind myself of what is there, then I realize I've written hundreds of them, most all unique compositions totalling hundreds of thousands of words related to mostly photography, but also about experiences around those photographs. A life collection of sorts they are, about adventures in photography and at times mis-adventures in life. Occasionally, I will re-read one, or two, or three and think, you know that was a good article, and then wonder if anyone else thought so for there are few if any comments attached to them. 


Those stories will be there for a very long time, maybe long after I am gone. They contain photo captures of moments in time that will never again present themselves, but more importantly, they reflect a part of who I am and how I see the world. I suppose that makes them important...to me anyway.

Sometimes I do wonder why I do this...write all these blog posts. I often wonder if people actually read them or do they simply click LIKE and move on, or just move on with indifference without doing anything.

Then, I wonder to myself, again, who am I doing this for? Is it for the few people who actually take time to read the articles, or is it for myself to satisfy some kind of creative inner desire to share what I know with others. Not sure I really know the answer, nor am I sure I want to know.


Still, I have many photographer friends and I've enjoyed associating with them over the years, but sometimes I wonder if I have managed to ignore other just as important parts of my life because of it. Often that kind of association can lead to certain assumptions that may or may not be accurate which eventually, when reality sets in, I often discover I have made incorrect assumptions about the ideas I was contemplating.

The results of such thoughts can often lead to disappointment and maybe even some feelings of rejection. Then again a good dose of reality can slap you back into focus and redirect your desires and whims to realign them with what truly is important.

Not sure why I am writing this post as it is so different from all the others I typically write, driven mostly I suppose by melancholy thoughts resulting from missed opportunities or rejected attempts to connect with people in a positive way. It is a difficult pill to swallow to have your efforts and work seemingly go unnoticed, maybe unappreciated, but, that is a part of life all of us must endure from time to time.


Oh, I understand not everyone thinks the same way and they have lives too that carry them here and there, to the point what small token offering I might supply seems rather unimportant. I'm sure I've done the same thing. I suppose, if I wonder about it long enough, I'll get over it and continue to do what I've always done; create simply because I can, pursue simply because I want to, and enjoy what I do regardless of what others might think.

The important thing is to keep striving, keep moving forward...in short, to keep wondering about hopes and dreams regardless if they come true or not. I would rather have wondered about such things most of which may never come true, than to go through life stuck in a rut filled with little or no wonderment about what is out there and never having known the excitement of what can be.


I've found myself alone at times wondering what lies over a distant hill, then I hiked to the top of it just to see what was there. I've gazed toward a dark night sky searching for hidden wonders. I've stood facing a prairie storm with nowhere to hide, and drifted on silent waters under a canopy of stars.


I've heard the thunder of a thousand stampeding bison, and listened for hours to the calming silence of a wandering breeze. I've stood knee deep in a drift of snow stung by a biting wind at my face, and held a hundred delicate blooms in my hands. I've captured the subtle movement of a sunrise and the bold flavor of a thousand setting suns.

When I write about photography or when I offer to do a workshop, it is not just the technical X's and O's I offer, I'm offering an opportunity to share the experiences associated around those photographs. I only hope others will understand such things.

Why do I wonder?  You know...maybe I've just answered my own question.


Friday, June 23, 2017

Depth of Field - How I use It

Simply stated, Depth of Field (DOF) is that portion of a photograph that remains in focus both in front of and behind where your focal point is made. If I focus on a particular object, depending on the focal length of the lens, the aperture, and where I focus, a certain portion of the image may or may not remain in focus. The longer the focal length of the lens, something like 200mm or 400mm or larger, the relative depth of field becomes narrower for a given aperture. The larger the aperture, say f/2.8 or f/3.5...or even f/6.3 as opposed to a small aperture like f/16 or f/22, the narrower the Depth of Field becomes.

Here are two examples. The first image is general scenic shot that required a short focal length lens 18mm along with a small aperture f/22. By doing so, virtually the entire image remains in focus from almost directly in front of the lens to all the back to the sky. This is an effective technique to use for most scenic shots.


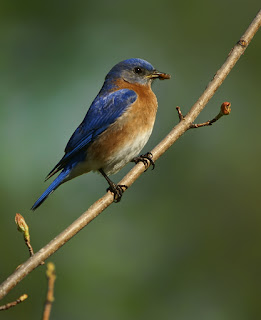
This next image is a subject specific shot where I used a long focal length lens, 500mm, along with a relatively middle to large size aperture, f/6.3. The idea on this one was to isolate the blue bird against a blurred background. The 500mm lens does by itself shorten the DOF which in turn creates a blurred background, but when combined with a larger aperture the effect can become quite dramatic.


What is important here is understanding how to use Depth of Field effectively in a photograph. So let's discuss how I use it and what I look for.

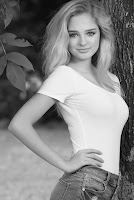
I use a tight DOF and a wide DOF for all kinds of shots including both scenic and subject specific shots. Subject specific shots are those shots where you want to isolate your subject and emphasis its characteristics without interference from visual background noise. Portrait closeups are good examples on when to use this technique, like the image shown here.


I most often use this approach when the background is generic in nature and can be used primarily as a simple natural backdrop. When blurred, the background now becomes something that enhances the image as opposed to competeing with it. However, there are times I want to include the background as part of the portrait. This is most often applied when the background provides a Measure of Place for the portrait, like this next image which was shot as f/10 at 50mm. As you can see, the entire image remains in focus with the pillars providing a dramatic flavor to the image.


Keeping with that idea, scenic shots can be quite effective when created using a tight DOF. Shots like these are approached much the same way as closeup portraits. Hre, I wanted to isolate this branch of fall leaves against the golden brown of the background. By doing so, the background blurred as it is contributes to the color flavor of the image without interfereing with the main subject.


The point is...always be aware of your surroundings, especially what is in the background and plan your shots according to the type of DOF that will create the most appealing effect. It is a realtively simple concept that more often than not is not always properly used. By understanding how your camera / lens combination works in regards to DOF, you can use this technique to generate some amazing photographs.

Sunday, June 11, 2017

A Day in The Field

Early June sometimes finds itself struggling to decide where it wants to go. It seems to know the dog days of summer are but a week or two away, yet somehow probably in defiance of the inevitable, the first week of June seems to always cling to the last remnants of spring. That is the way it was leading up to and then falling on a single June day afternoon recently. For six months we had tried to schedule a location shoot but available time and circumstance prevented us from connecting...that is until that day.


Leading up to our shoot the previous few days rain fell and the tempertures dropped lower than are typical for this time of year around these parts. Then the days turned almost perfect when highs in the mid 70's along with a light breeze. Clouds rolled in and created a covering blanket of soft white, which for a photographer is mostly perfect as the sky then becomes a giant softbox casting gently smooth light. Our day was set and the shoot was on...location was Romanza Johnson Park where Trammel Creek winds its way around the edges.


I showed up a little early to set up the changing tent and the speedlight stands...checked and rechecked the settings and the camera remote; Group A channel 1, Group B channel 1...yes, the power settings changed on queue for each. The softbox was attached to Group A light and Group B was powered down to about 1/32nd power...just enough to provide a subtle highlight. Group A is always my main light, and Group B is usually my main highlighter. Sometimes I'll use up to four lights adding a Group C and D all fired as Channel 1, but this day only two lights proved necessary and as it turned out, they worked exactly the way I planned.

My model was a delightful young lady, Sophie, who arrived shortly there after with her mom. After a quick intro as to what we were wanting to accomplish, we decided to setup along the split rail fence that stretched along the entrance road on the outer edge of the park. Because of the rain, the ground was too muddy elsewhere and the creek was running higher than normal preventing us from using the gravel bar.

The first few shots I made were simply establishing shots to verify exposure and light angles. Turns out a few of those were pretty good shots and became part of the image grouping. As always my desire was to have the model simply be herself, yet add a hint of sassy along with a dash perky. Some models are more difficult to work with, but some, like Sophie, took to it like a pro. I never overdo instructions, choosing to drop hints and suggestions and then let the model fill in the gaps with her own style and personality. Sometimes it is necessary to encourage a bit more animation from them and then offer a range of opportunity for them to give it a try.


I almost always use a long lens as this allows for a wider range of depth of field control plus it reduces any uncomfortable personal space intrutions that might occur using a shorter focal length lens. Some of the most effective shots are done when you simply allow the model to slowly move across a few yards without posing, without becoming too static. A flip of the hair, a subtle look down, a slight tilt of the head, gentle smile...allow the natural light to work the background, but allow the model to become herself without being overly concerned about her actions. Just allow the off camera flash to fill in the rest of the light.

The key...the eyes. They must be clear, bright, and sharp with strong color definition. Always focus on the eyes, not always an easy compositional task when your model is moving toward you. The trick is to take a lot of shots so you will almost always have a few come out the way you want them to.

Most of my shoots last about an hour and half...move out much past two hours and everyone starts getting tired with a noticable drop off in energy.

Every photographer develops their own style and I haved gained a great deal of insight from many of my photographer friends. Some tend to slant toward more of an edgy look, others are very creative and stylish, still others are plain and ordinary. Over time my style has grown into a simple homey look accented with a slight amount of sass and sweetness. Mostly I just let the model be themselves as much as possible and encourage them to loosen up enough to feel comfortable with what we are doing.

All in all this early June outing turned out to be a delightful day in the field...and the results...well, I think they turned out rather well.


Tuesday, May 23, 2017

B-29 FIFI - A Portrait of a Legend

The B-29 bomber of World War II fame proved itself an iconic airplane both in design and function. It became the most expensive design project during the war exceeding even the development of the Atomic Bomb in cost. Almost 4,000 of them were built and two of them, the Enola Gay and Bocks Car dropped two atomic bombs on Japan ending the war.


When one of the few flying examples of the B-29, FIFI, came to Bowling Green, I had to take advantage of the opportunity to capture this beautiful airplane. What I wanted to do was photograph it at dusk using several speedlights along with some light painting, however, when I inquired about doing such a thing, the crew balked and it fell through. I was left with trying to capture the nostalgic nature of FIFI under less than ideal conditions. As a result, the images I took were made with the intent of creating black and white images. Black and white lends itself well to capturing dramatic skies when the lighting conditions are marginal. Converting to B&W allows one to take advantage of contrast which will offset the negative factors assiciated with middle of the day lighting. Another difficulty were the other people who had come to see the B-29. It was difficult to shoot around them and in some cases it became necessary to clone them out of the image in post processing, not always an easy task.


Fortunately, in spite of the tough conditions, the sky cooperated and I was presented with a blend of whispy clouds and blue skies, both of which contributed to exciting black and white conversions.


The idea behind the images was to recreate that 1940's look. The conversion process included using Nik software Silver Effects which allows for various black and white effects including simulating the use of different kinds of black and white papers. This advantage creates exciting possibilities. Most of the images that were converted used the Ilford Delta 100 Pro paper simulation. I also applied a sepia tone effect on a few of the images, along with high contrast and high structure giving the images a powerful, crisp look.

Capturing a portrait of a legend like the B-29 transported me if only for a few moments back in time to another era when because of the circumstances of the time, great planes were created which were destined to become some of the most beautifully functional machines ever created.

Tuesday, May 16, 2017

How The Picture Was Made - Blending Two Zones of Light

Photography requires as much post processing as it does time in the field. In fact, almost all digital images require some post processing to bring out the extra pop we all desire in our photos. Fortunately, there are a few easy to learn techniques that help us in creating a finished photograph. One of these is knowing how to blend two Zones of light.


First let's go back a step or two. Blending two zones of light starts in the camera and is accomplished by taking at least two separate images of the same subject, one using the ambient light and one using a speedlight(s), then blending them in photoshop as a single photograph. The reason we do this is because when using speedlights, it sometimes becomes necessary for the lightstand to be in the shot in order to get the best angle to light the subject. When that happens we need an easy way to remove the lightstand without having to perform a lot of cloning magic which can at times get cumbersome. It is also necessary because the ambient light is almost always darker than the light from the flash and we must allow for the 'Burning In' of that background light before the flash fires to illuminate our main subject.

Let's look at the portrait of a 1976 Corvette I recently made. The situation was like this. The background was the National Corvette Museum and I wanted to take the photo during that narrow window between dusk and dark. Doing so would allow for the capture of the dynamic lighting on the museum's Skydome and also allow for some of the dusky light in the sky to be captured. This however prevented me from capturing the Corvette with a correct exposure using just the available light. To accomplish that feat required the use of multiple speedlights positioned strategically around the Corvette to illuminate it.

The two zones of light then were; The background ambient light coming from the sky and the museum, and the speedlights used to expose the car. In order to have an effective light on the car required that two of the speedlights, one with a softbox attached, be in the shot. A first baseline photo was made without the lights in place and was done simply to get the ambient light exposure where I wanted it. The second shot then was setup with the lights in place to capture the car.


The first two images then shows the ambient light photo without the speedlights in the picture. It was opened as a RAW image and tweaked to obtain the desired results for the background light, then saved and opened inside the Photoshop Elements work window. The Tweak settings were noted for later use.


There were some powerlines showing in the sky in the upper left of the image so they were removed using the Healing tool. Then the second image taken using the lights was opened also as a RAW image.


Notice the softbox showing in the upper right of the image and also not as noticeable the speedlight sitting on the other side of the car firing into the window. The same RAW settings were applied so the second image would closely match the background settings of the previous image. Notice the Powerlines are also visable in the second image, but they were left alone.


Next I used the Select All option under the Select dropdown box then selected Copy under the EDIT dropdown. I then reopened the first image and used the PASTE option to overlay the second image exactly on top of the first one. This created a Layer Mask that could then be used to erase anything showing on the top layer to expose what was beneath it. In this case I simply seleted the Erase tool and expanded the brush to a medium size and erased the sky area, the softbox, and the speedlight shooting into the car.

With a little more applied tweaking of the brightness, contrast, color, and the removal of some stray artifacts to clean up the final image...the results!


Wednesday, May 10, 2017

1976 Corvette - A Challenging Shoot for an Iconic Sports Car

The Corvette, America's iconic sports car has survived the test of time. From beginning's in 1953 it grew in favor and reputation until today where the newest cars are so filled with technology those of us who remember the good old days can hardly fathom the engineering used to create these marvelous machines. The first one I remember seeing and knowing it was a Corvette was a black 1963 Stingray. I was 11 years old and a neighbor down the street parked his new sportscar in his driveway. It took about three minutes before every person in the neighborhood hovered around this beauty. I've been fascinated with them ever since and even today as I am able to work parttime at the National Corvette Museum, I find their styling and mystique as endearing as ever.


A friend of mine, an ex-Navy guy and former co-worker Jim Rhea, some years ago discovered an early model icon sitting in disrepair with weeds growing out of the engine compartment and vines wrapping themselves around the body and inside the cab . The floor was rotted, windows busted, upholstery torn and frayed, and the wiring in disrepair. Even so, he saw not a ruined derelict, but a great project full of potential, one that would eventually take him over 18 months to restore. When he was finished, a 1976 Corvette was raised from the ash heap of forgotten dreams and restored to its former glory.

We met up again recently to spend a couple of hours photographing his re-creation using another symbol of this beautiful car as a backdrop; The National Corvette Museum (NCM) in Bowling Green, Kentucky. This is the story of how we pulled off a challenging photographic session.

My goal on this shoot was to capture a single exciting photograph of this beautifully restored vehicle. One that captured not only the car's styling but the car's muscle and pedigree. Photographing a white car against a dark background is not an easy task when using speedlights. The risk is over exposing the white and underexposing the darker areas.

The first problem was to identify the basic process. I decided on using four speedlights, wished I had five, one with a softbox positioned so as to capture the lines and aesthetic values of the car. The idea was to position the car in front of the Sky Dome at the NCM and shoot around the dusk hour so we could capture not only the car but the dynamic flavor of the cone-shaped Sky Dome as the backdrop. I decided to once again use the flash sync process known as Rear Sync, where the flash does not fire until the end of the shutter cycle. This would allow for burning in the background and then filling in the car with light at the last moment.

We also needed to figure out how to best position the car in relation to the Sky Dome which took some trial and error. Once we had the basic configuartion figured out, it was a matter of positioning the lights to illuminate the car while we also captured the background in the same shot.

The basic exposure values were ISO 400 - f/8.0 @ 2.5 seconds with the lens set at 20mm and secured on a tripod. I used manual focus to make sure the car was the primary focal point Once the exposure was set, the camera was not touched and was fired using a remote cable.

The lights were setup in this manner: The main light with a softbox was positioned about 6 feet in front of and slightly to one side of the car somewhat above eye level with the softbox rotated to the horizontal position. It was also set to about 1/4 power initially. This was my key light. One speed light, set to 1/16th power and zoomed in tight, sat on the ground slightly pointing toward the front tire. This not only brought life to the tire, it created a seam along the front curve of the body fender. A third light, also set to 1/32nd power, was pointed toward the rear tire well which rounded out the side lighting on the body. The fourth light, set to 1/64th power was positioned so it would shoot into the cab area thus illuminating the inside of the car.

My camera was positioned at about 45 degrees from the front and was positoned above eye level. With this as a starting point, we made several exposures and checked the results, then tweaked the lights as needed moving them in and out or to one side to even out the light on the car. We eventually had Jim hold the key light and angle it down so as to illuminate the top of the car with more light.

Although not bad for a first attempt, there are a few things I would do differently next time. Even so, the shot came off pretty well. Thanks to Jim for allowing me to capture his iconic car in front of an iconic museum.


Monday, April 24, 2017

The Night Train Portrait: Applying Rear Sync Flash as Part of the Photographic Equation

Shooting with off-camera lighting is possibly one of the most misunderstood elements of photography. Many photographers shy away from using them simply because they do not understand how. I know because I was for many years one of those photographers who relied on the excuse, "I prefer to use available light," which really meant I had no clue how to use speedlights. Yet, after studying the results of other photographers who did use speedlights, I became convinced of the value and creative power off camera flash can generate. The principles behind their use are actually quite simple, however, learning how to apply their power to my photographic desires has been an uplifting challenge I continue to develop.


One of the most creative ways to use speedlights is to apply what is known as Rear Sync Flash. Rear Sync is fundamentally quite simple. It is best used in low-light situations where it allows you to apply a slow shutter speed to pickup more of the ambient light, then freeze your subject with the flash which fires at the end of the shutter cycle. In other words, the shutter opens and remains open for an extended period of time before the flash fires just before the shutter closes. This also allows the camera to pickup some movement before freezing the subject. Used creatively, you can obtain some amazing results.

Trial and error, and applying visual compositional equations that work allowed me over time to build confidence in using off camera lighting. The Night Train Portrait shown here is one of my first portraits using speedlights where I stretched the imaginative realm beyond what I would ordinarily do. It was a moment when the use of artificial light became a larger part of the equation and was blended with a wonderful nostalgic setting along with appealing ambient light. It became a moment where the creative impact of off camera lighting was applied fully to create an exciting photographic moment.

Lets look at how this image was set up. The background, the Bowling Green Historic Railpark and Train Museum, was a key element in the design of this image. I wanted something classic and nostalgic as a background, yet interesting. Bold, yet simple. A place where design and simplicity of character were present. The bold incandescent lighting in front of the building provided a contrasting warm tone that worked well against the dark blue of the sky at dusk.

The model, the lovely Dallas, provided a delicate strength to blend with the contrasts of the background. By shooting from a low perspective, I was able to partially isolate her against the smooth texture of the sky. Although I knew pretty much how I wanted to setup the shot, applying the lighting took a bit of planning as well. On most location shoots I will use one light, sometimes two. For this image I wanted to take it to an entirely new level. To concentrate on creating one photograph, and one look. To experiment with Rear Sync creative lighting.

Two lights were required for this shot. One Key Light and one Kicker Backlight. The backlight was placed to create a halo around the model and the trailing train of material. All lights were fired remotely using a camera mounted transmitter. The train consisted of 3 yards of thin cotton material in a Burgundy color because burgundy will work with almost any color...white, blue, black, red....My model was wearing a delicately styled patterned dress which added a measure of elegance to the composition.

The Key light, set initially to about 1/8th power was on a stand set to be slightly higher than and about 4 feet in front of my model, just out of the line of sight of the camera lens.  The kicker light was placed on a stand behind the model. Its power setting was initially around 1/32 power, about 2 stops lower than the key light...just enough to provide a rim light effect. My camera, as always when using speedlights, was set to manual and the flash mode was set to Rear Sync. I used a wide angle lens and needed a bit of depth of field to keep the background somewhat in focus so I used an aperture of f/6.3. I also needed more light gathering ability so I bumped the ISO to 800 which allowed me to use a shutter speed of 1/6th of a second.

The beauty of using flash is that it freezes your subject so even with a slow shutter, my model was still sharp and clear, yet the ghost-like movement of the material was captured during the non-flash portion of the exposure. To keep the background sharp I set the camera on a tripod collapsed all the way down to its lowest level and made the shot from a low angle.

At that point it was simply a matter of choreographing an interesting look with the model which took some trial and error, but the results turned out better than I hoped for.


Monday, April 17, 2017

The Creative Edge: Finding The Right Stuff

Many photographer friends of mine are excellent photographers. A good number of them are outstanding while most are solid practitioners of their craft. From all of them I see elements of inspired creativity and from all of them I have learned a great deal about applying technique in the field. A few of them clearly stand apart from the others in their ability to be creative and unique. Often I will gain inspiration from their work, but more importantly, I gain a greater perspective of what it takes to truly stand apart from all the rest. What I see in them is their ability know the difference between creating good, routine images, to understanding and applying a creative edge to their photographs. The Truth is...they possess The Right Stuff.


There are times I am able to observe other photographers in-the-field work flow. I watch what they do, listen to them explain what they are thinking, and I see the fruits of their work. From these observations and applying what I've learned to my own attempts, I've come to understand that taking the leap from being a good photographer to one who is truly creative is often a matter of continuing to think beyond the ordinary, to push the thought process to another level, to take each new image challenge a greater distance. Think of it like this; One does not become an expert at playing the piano except by pushing to play increasingly more difficult musical scores. Only by working through the new challenges does one become stronger. The same applies to photography.


Too often I discover too late that I failed to push the creative process far enough. In other words...I settled for what I had. The results, although sometimes promising, often fell short of my expectations as a photographer. But each time I examine mediocre results, I learn a little more, begin to recognize the limitations I placed on myself, and move closer toward finding the right stuff. I've discovered that failure in a photograph is never truly a failure if you learn from it. Oddly enough, I've failed so many times one would think I would be a lot farther along my creative learning curve, but the curve is long and undulating and in some places very steep.


Finding the right stuff as a photographer I do believe requires one to try many kinds of photography. Always doing the same thing over and over tends to reinforce old, bad habits. Trying something new forces you to rethink what you are doing both in technique and in creative thinking, and it builds upon what you already know. Then, when you do return to your comfort photographic area, your ability to look at what you do from a fresh perspective opens the door for more in depth creative thinking.


Finding a Creative Edge requires a degree of imagination. I often see (and take) technically good photographs, yet they often lackthat all important artistic element, one that is difficult to teach. In workshops I have taught I almost always emphasize the concept of looking and thinking beyond the ordinary. This alone, once mastered to the point it becomes instinctive, helps you the photographer to visualize your final product before you ever release the shutter. Sometimes we get lucky and things simply fall into place in spite of our efforts, but those with the right stuff have an uncanny ability to create with their imagination, then capture it with technical skill that lies beyond the scope of what most of us possess.